

Invoices
Invoices are legal documents, essential in the invoicing process, considering that they prove a commercial transaction between an entity and a buyer. Invoices are legal documents that detail the provision of goods and services, including all elements involved in a commercial transaction, namely, the organization, customer and product data being traded. Even if not requested by the customer(s), issuing invoices is mandatory to comply with the fiscal requirements. According to the requirements of each sale, it is possible to issue different types of invoices, according to the type of activity and operations, as well as the values involved. It is possible to issue: Before issuing any type of invoice, you must adjust the setups for the correct document issue. After creating the type of invoice desired, you can issue the necessary invoices, by specifying all customer and payment information. The Invoicing Engine also allows to duplicate these records with all information from the original invoice, which streamlines the process of creating invoices. To issue and/or duplicate invoices, follow these steps: To issue invoices to an intracommunity or external market customer, it is necessary to associate the information on the VAT Regime to the customer file. This association must be performed in order for the transactions with this type of customers to comply with specific VAT schemes when invoicing. For example, a company based in Portugal must select on the customer file, the CONTINENTE-UE scheme in the case of intracommunity customers or CONTINENTE-EXPORT in the case of customers from outside the European Union. This way, the transactions with these types of customers will comply with the specific VAT schemes when invoicing and all VAT rules will automatically be followed. To associate tax regimes to the customer, follow these steps: This way, when issuing an invoice to an intracommunity or external market customer, on the tab Taxes associated to the document, the corresponding VAT regime will be suggested. The app includes the configuration of a wide range of VAT schemes, including the schemes associated to the markets. It is possible to issue invoices for advance payments received before the transaction of goods or the provision of services. According to the VAT Code (CIVA), every time you receive an advance payment for an order, you are required to issue an invoice or a similar document for the amount received. As explained in paragraph b), no.1 of article 29 of CIVA, you must "compulsorily issue an invoice for each transaction of goods or provision of services, as defined in articles 3 and 4, regardless of the quality of the buyer of the goods or recipient of the services, even if they do not request it, as well as for payments made to them before the date of transaction of goods or provision of services;". This fiscal framework also requires the VAT settlement of the value of the advance payment, at the applicable rate to services provided and/or goods transacted. After issuing the final invoice, you must issue a credit note for the amounts received in advance, in order to rectify payables and receivables. Note: On the credit note and on the final invoice, you must reference the corresponding advance payment invoice. The advance payment process follows 3 steps: Let's consider the following example: When this occurs, you must issue an advance payment invoice for the amounts received, as presented on the table: Advance payment amount 100€ At this moment, you must issue a final invoice for the value of 1000€, with a reference to the advance payment invoice, as presented on the table: Sales value 1000€ Next, you must issue a credit note, referencing the advance payment invoice to settle the advance payment value, as presented on the table: Credit value 100€ To adjust the company invoicing to the tax regional area of your customers, you can use different currencies when managing price lists and issuing documents. To record an invoice in a foreign currency, follow these steps: In cash purchases, a Cash Invoice is issued. This invoice is known as a automatically settled invoice because it is a type of document that does not generate an open item. If this customer returns the item, you must correct the purchase with a credit note. By default, the Invoicing Engine has a document type named Automatically Settled Credit Note (NCA) that does not generate open items, and the payables and receivables are automatically settled. To correct automatically settled invoices in the case of return or exchange, follow these steps: When the credit note is generated, the customer payables and receivables will have a positive credit, that should be rectified. To correct payables and receivables in the case of payment return to the customer, follow these steps: If the customer wishes to exchange an item for another, it is necessary to perform the new sales and issue the corresponding receipt or payment note according to the value of the difference between these two items in Receipts and Payments | Receipts or Payments. When a company trades goods and services or has customers, suppliers and other entities with VAT exemption, it is mandatory to specify the exemption reason on the issued documents. The exemption reasons have been standardized by the Portuguese Tax Authority (AT), according to the current legislation. This way, to communicate the sales documents to the AT you must ensure that, when issuing an invoice with VAT exemption, the VAT rate and the exemption reasons are correctly set up. It is possible to issue several exemption types on the same invoice, making it easier to associate an exemption reason to a specific item. To streamline this process, you can define a default VAT Type in each item file. This way, when adding the item in an invoice, this VAT Type is filled in automatically. To add more than one exemption type on the same invoice, follow these steps: After creating the tax codes, you must create the VAT types from the created data. To create the several VAT types, follow these steps: After creating the tax codes and the VAT types, you must create a VAT Regime that contains all VAT options and the corresponding exemption reason. For that, follow these steps: You can view the exemption reasons on the Invoice Totals at any time, and they are also printed on the invoice.Types of invoices
– When retailers/street vendors sale of goods to a final customer, a non-taxable person;
– When the total amount of the good transaction is inferior to 1000€;
– When the total amount of the service transaction is inferior to 100€;Issuing and duplicating invoices
Issuing invoices
Note: If the receivable is check, you must select this option and insert the no. on the field Reference;Duplicating invoices
Issuing invoices to intracommunity customers
Note: You must select the tax according to the corresponding tax regional area;Issuing advance payment invoices
Advance payment process on Invoicing Engine
1. You receive an advance payment of 123€ regarding an order of goods subject to the normal VAT rate.
Advance payment VAT 23€
Total 123€
Note: If you don't have a specific document type set up for advance payment invoices, follow the previous steps.2. You sell your goods for the value of 1000€ + IVA, and you have already received the previous advance payment.
Sales VAT 230€
Total 1230€3. Correcting payables and receivables
Credit VAT 23€
Total 123€Saving invoices in a foreign currency
Note: If defined on the customer file, the currency will be automatically suggested when associating the Customer to the document, on the Financial area;
Note: If the currency is different from the base currency, the field Exchange Rate is filled in with the existing information on the system;Correcting automatically settled invoices
Correcting with an automatically settled credit note (recommended)
Correcting with a credit note
Note: This document must have the opposite nature from the previously issued document;Adding several types of exemption on the same invoice
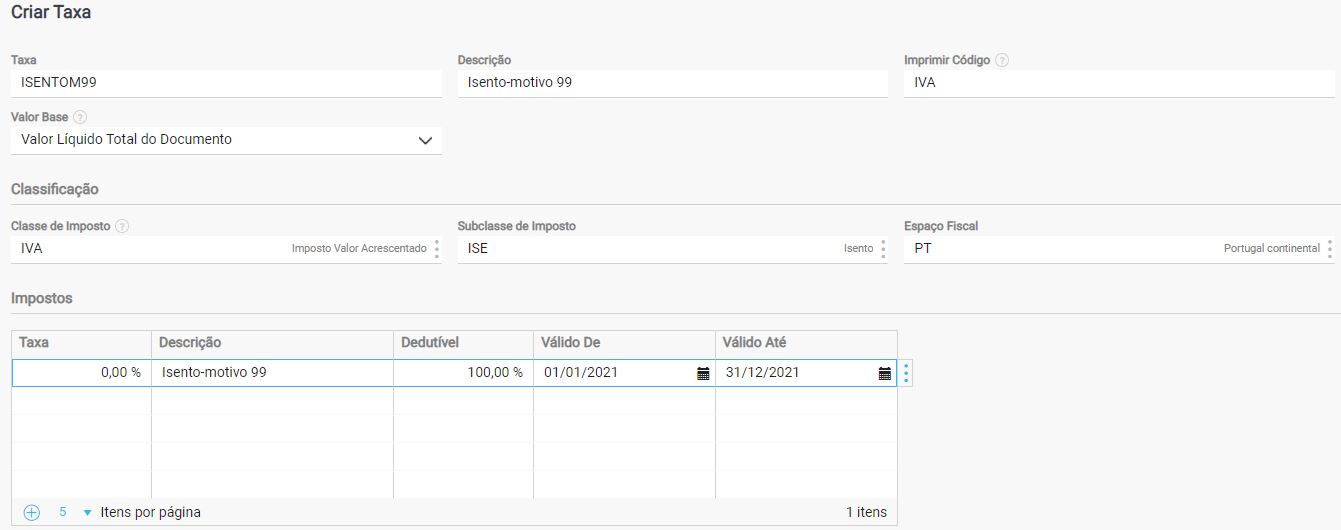
Step 1: Create Tax Codes
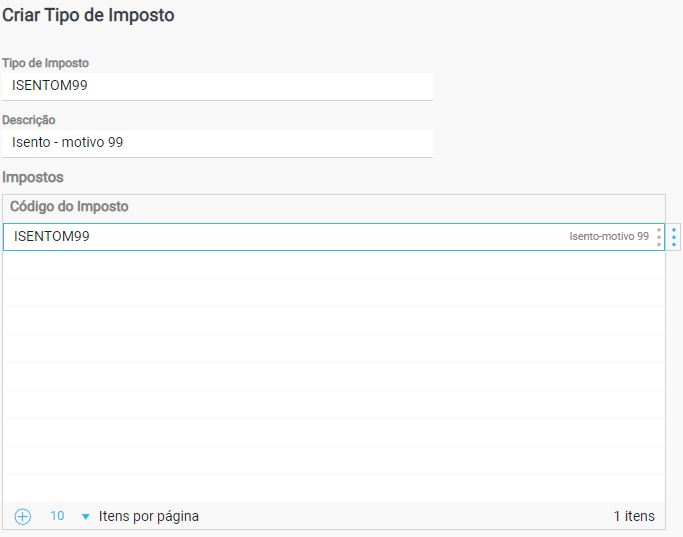
Step 2: Create VAT Type
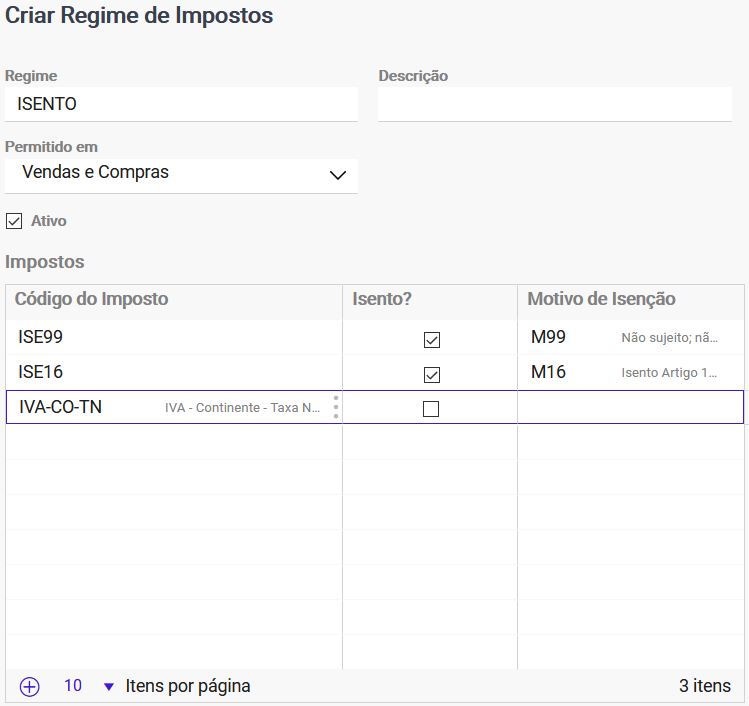
Step 3: Create a VAT Scheme
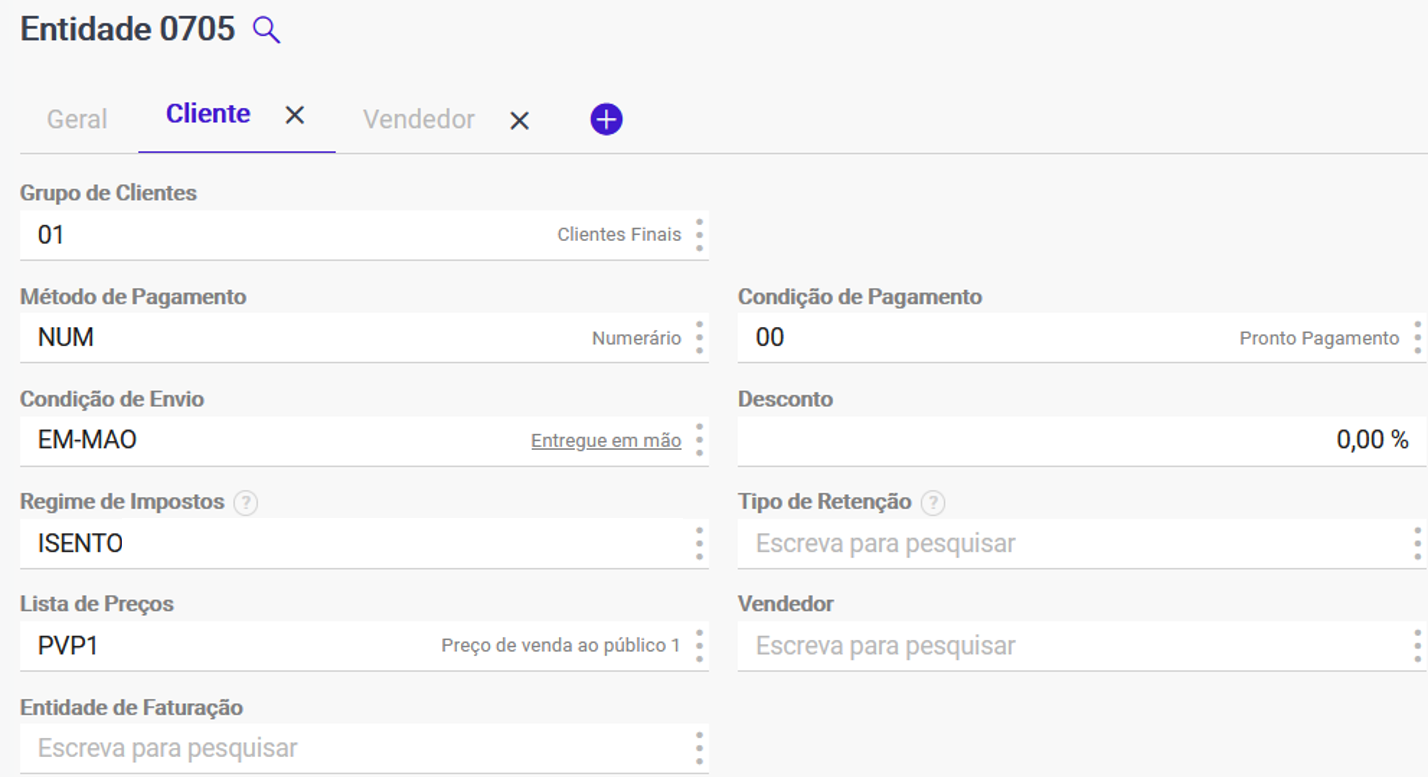
Step 4: Associate the VAT Scheme
Step 5: Define the VAT type on the invoices
