

Getting Started
Invoicing Engine is a cloud invoicing engine designed to ensure that the main company needs are met, adding speed and security to the invoice and document processing. This solution allows to integrate your invoicing workflow via API in a fast and simple way, as well as issue invoices without worrying with the number of documents or fiscal issues. The Invoicing Engine is correctly certified by the Tax Authority, complying all legal and fiscal requirements associated to the invoicing. To support business management, the Invoicing Engine interface has been built to improve usability and a create a natural and fluid user experience, as well as a fast interaction with the different features available.Getting to know the interface

Dashboard
To easily keep up with company information, the initial dashboard presents the updated data and indicators to achieve the organization goals and control your business' financial health.
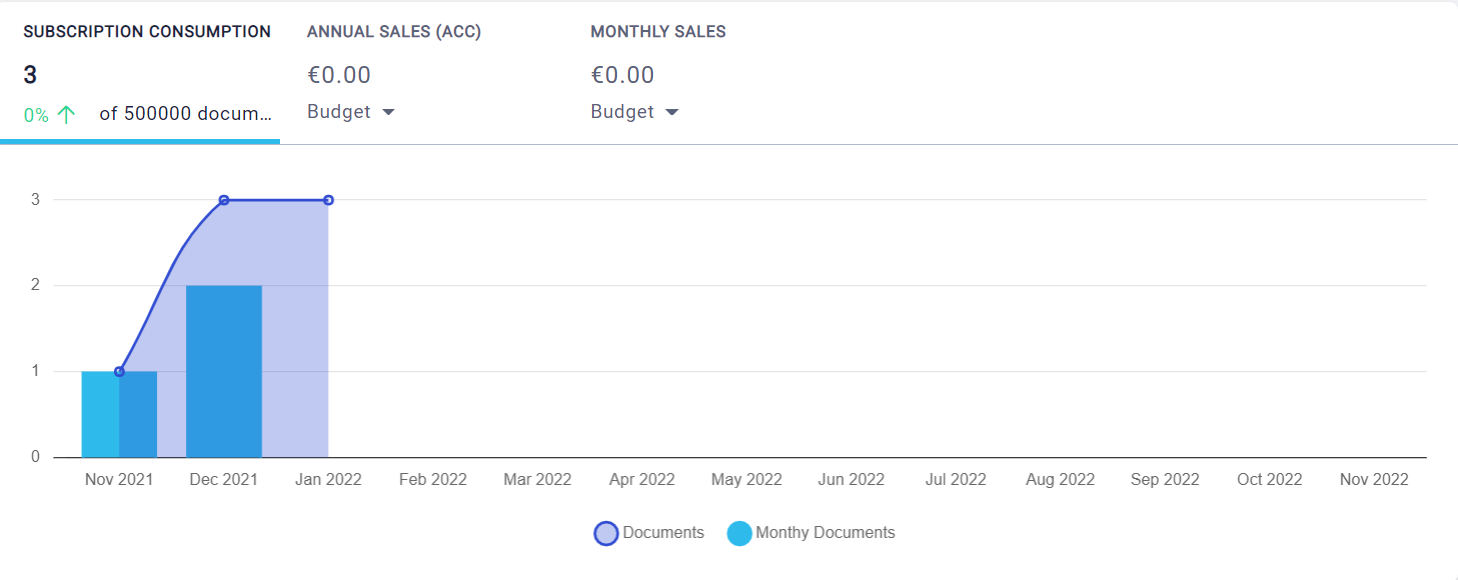
The dashboard presents the following data:
- A management indicators area;
- A graph with the evolution of the indicator.
Menu
To control the processes and workflows, the left bar is divided in three main areas:
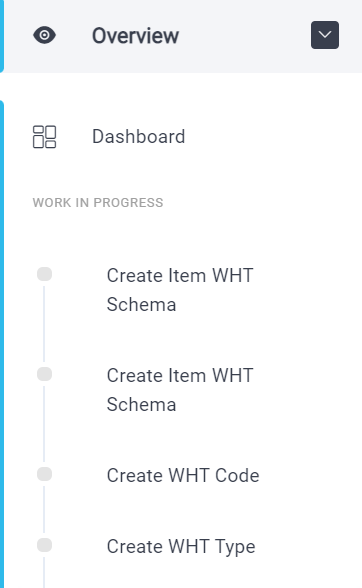
- Overview: By clicking the Overview, all the available features are presented. From documents to setups, you can manage all company data, so that you can invoice;
- Dashboards: Using this option, you can view the management dashboards at any moment;
- Work in Progress: To keep up to date on the work in progress, when you finish a task, this operation will be presented on the menu.
Search
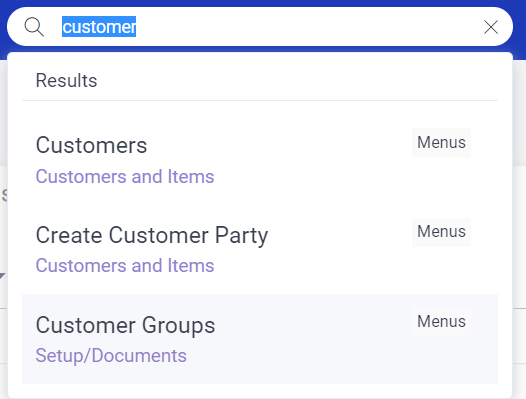
If you don't find what you are looking for, you can use the Search bar, that presents all the available options on the product.
Company selector
From the company selector, you can change the subscription and the company you wish to work on, and for that, there are two tabs.

Personal area
In this area, you can view the users for each subscription and the subscription, as well as access the Help Center.

Getting started
Now that the Invoicing Engine is your invoicing ally, you can set up your company and the corresponding documents using a set of tools and optimizing your business management.
1. Setting up the initial information
Validate all the data automatically filled in and create series to identify different document types. If you have records in another app, you can import them directly into Invoicing Engine. Learn more about the initial settings.
2. Validating sales settings
Configure sales documents to ensure the correct communication with the Tax Authority. Don't forget to validate the PVPs and sales channels used.
3. Adding customers
To create invoices and make orders, add your customers in Customers and Items | Customers.
4. Creating items
Create your items to start invoicing Customers and Items | Sales Items. Don't forget to add the price list(s) and define the corresponding price, on the Sales tab.
5. Customizing documents
Customize the templates to adjust your documents to your brand and company products.
Getting to know the integrated help
This help tool was built based on the product structure in order for everything you see on the product to match what you are searching on the Help Center. In this sense, the articles are organized to follow the product and task flow.
Contextual help
Whenever you have a question, using the context help, click on the icon with a question mark to quickly access the content related with the task being performed.
Concepts and How-To
The articles were designed to gather all the knowledge on the theme, that is, using the content bar (at the right) you can navigate all the related content.
Interactive content
To help your tasks, we offer checklists with all the necessary steps for the correct configuration of all system functional areas.
News and Release Notes
All changed made on the product are communicated in the news area, aligned with the product releases. You can also discover all small new improvements and corrections on the Release Notes category and keep up with the evolution of the product.
Suggestions
PRIMAVERA is focused in producing content that is more simple, current and closest to the reality of our users, and for that, we count on your help. Give us your opinion at the end of each article and suggest improvements and new contents on the Suggestions area.
Shortcuts to operations
On the Invoicing Engine the following shortcuts are available:
Lists
- Ctrl+Alt+N − New record;
- Ctrl+Alt+V − View record;
Grids
- Ctrl+Alt+D − Remove row (as an alternative, you can use Ctrl+Del);
- Ctrl+Alt+Ins − Insert row above;
- Ctrl+Alt+C − Copy to the end;
Search fields
- Ctrl+Alt+L − Allows to access the selection list. To select an option from the list, simply select and click the keys Ctrl+Alt+Enter.
Pop-up windows
- Esc − Close the pop-up window, canceling the operation in progress.
Navigation
- Use the keyboard to navigate the menu;
- Click the key ENTER to select an option;
- Click the keys Ctrl+Alt+M to access the menu root and it will be automatically open. If the navigation menu is visible, when clicking Ctrl+Alt+M the menu is hidden;
- Click the keys Ctrl+Alt+Home to access the Dashboard;
- Click the keys Ctrl+Alt+F to access the search. To delete text, simply click the Esc key.